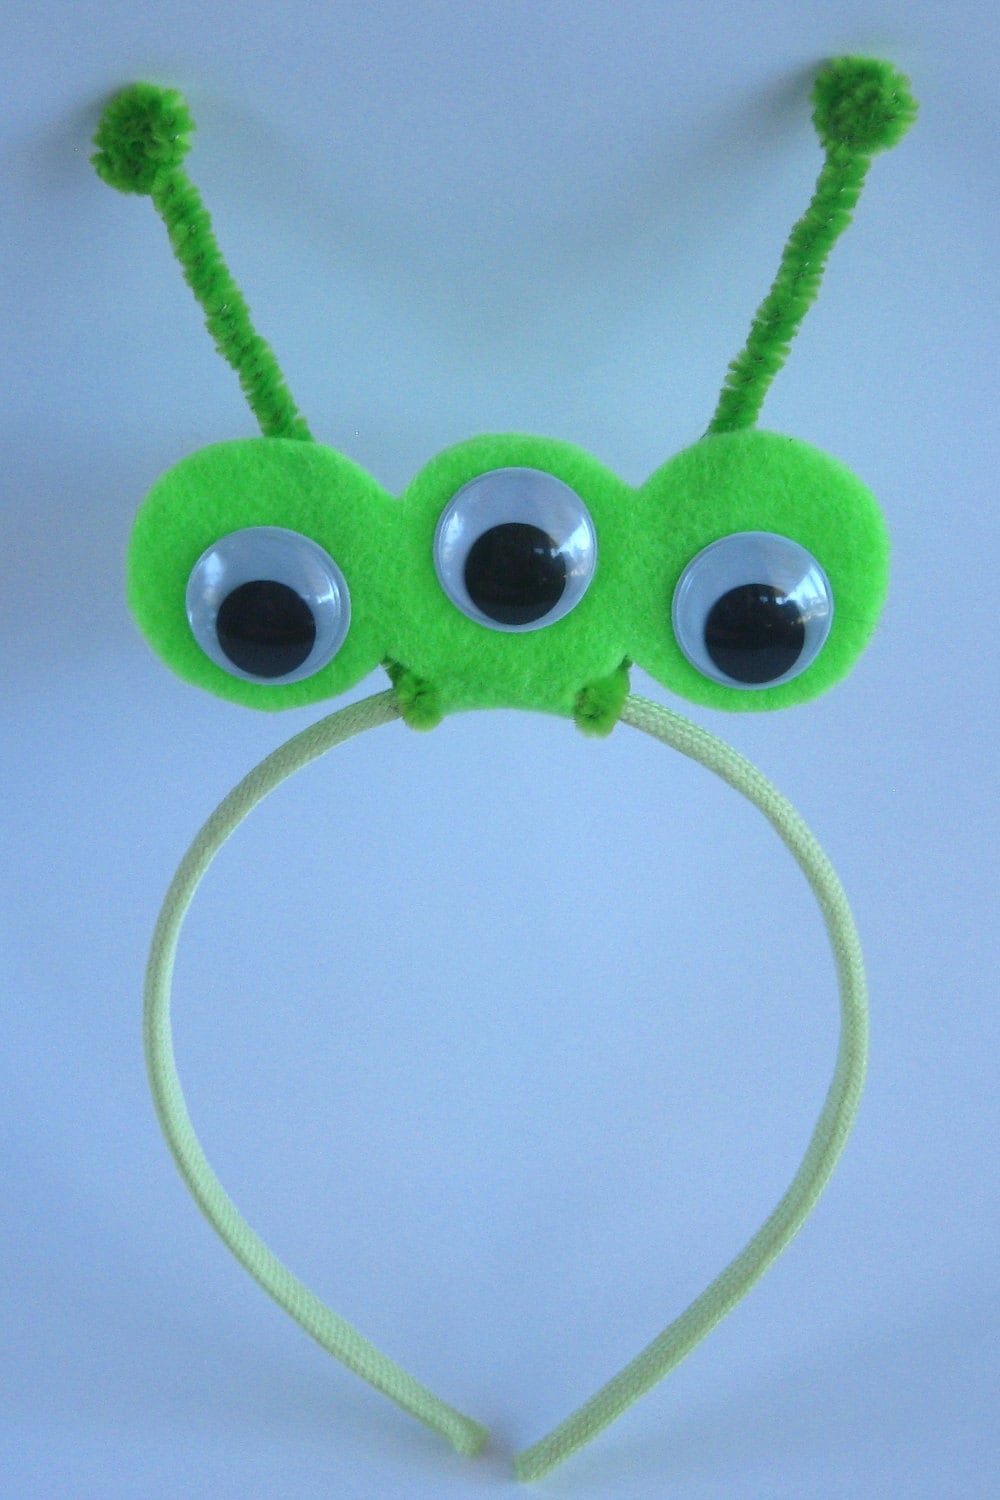
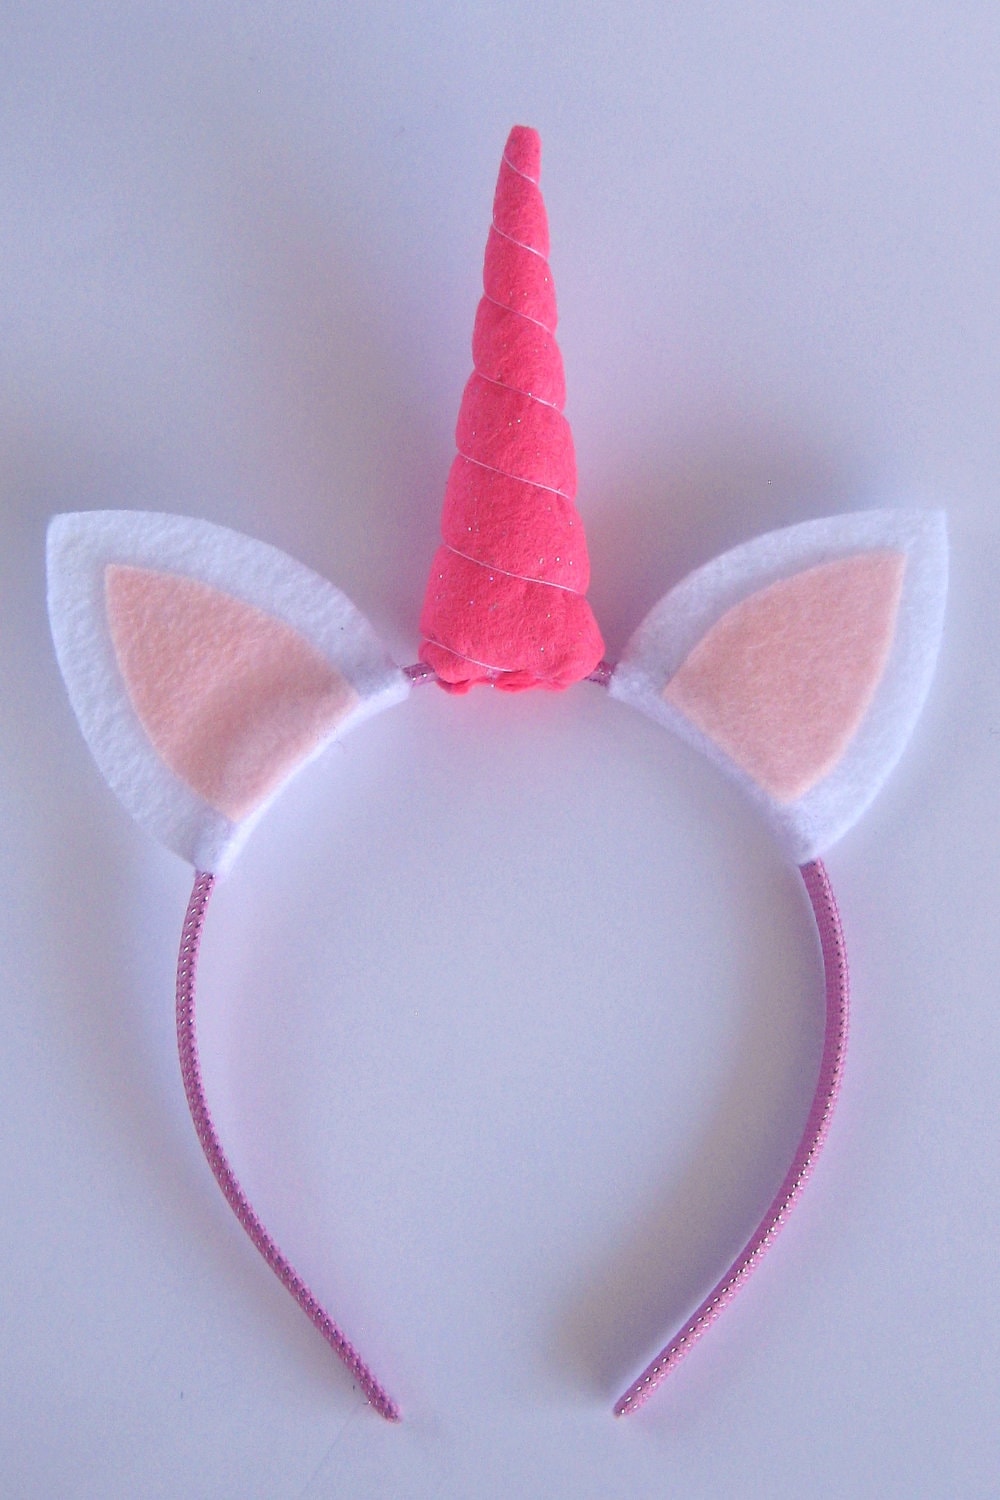
I decided to take the plunge an open an Etsy shop! You can find me here at Playtime Props. I'm selling the animal ears headbands like in this post, but I've added a few new ones...like this little alien.
And my daughter's favorite...the sparkly pink unicorn!
Come check it out! There might even be a giveaway on here in the near future ;
Monday, May 28, 2012
Saturday, May 19, 2012
Lion & Elephant Templates
Sorry for the delay in getting these up but the lion & elephant ear templates are now in Google Docs. You can get to them here!
Enjoy!!!
Enjoy!!!
Thursday, May 17, 2012
Would you like to buy the animal ears headbands?
I've been toying with the idea of opening an Etsy shop for a while now (well, actually I have one, but there's nothing in it) but I wasn't sure what I would sell...until these.
I'm still trying to decide if it would be worth it...so would you (or maybe someone you know) be interested in purchasing any of these if I were to sell them?
Friday, April 20, 2012
Applique onesies
I did something crafty! Yay!!! I needed that...I was starting to go a little crazy. Pinterest wasn't helping either...it was making my desire to craft even worse!
My mom picked up some onesies for me the other day and I got straight to work. I used fusible web to adhere the fabric and felt and then hand stitched them for added strength and cuteness. I'm expecting some fabric in the mail today, so expect more craftiness. :)
Both of these are Pinterest inspired. You can find them both (along with lots of other ideas I plan to knock-off at some point) on this board of mine.
And please forgive the picture quality...I'm blogging from my phone.
Tuesday, April 17, 2012
Felt Stocking
I know it is no where near close to Christmas, but here is the most recent project I've done.
Remember in my last post how I said that this pregnancy is kicking my butt and that there were some complications? Well, the complications got worse and I'm now on bed rest and have been for the past 5 weeks. So I made a stocking for our little boy (who is due to arrive in September). My mom made one for me from this same line of stockings and I made one for my husband when we got married. My grandma made one for my daughter and would have made this one too, but I figured I had plenty of time on my hands! I got this particular one from Amazon (here). There are a ton to choose from if you just search "Bucilla stocking kit". I made a few changes to the stocking...taking out all of the pink (since we're having a boy) and I replaced the lemon with a holly leaf. The lemon just seemed totally out of place to me. It took me about 3 weeks working on it off and on (I probably could have finished it in under 2 if I worked on it each day). The first one I did took me about a year to make...but I was going to school full time and working part time.
I'm hoping to get some hand applique done on some onesies in the next few weeks. Although what I'm really hoping for is to be off of bed rest! I'll post pics of what I come up with.
I hope you all have a great day!
Sunday, March 11, 2012
Hello? Anybody there?
Hi everybody! I just wanted to pop in and let you all know that I'm still alive. I know I've never been great at consistent blogging but this time I've got a pretty good excuse. I'm pregnant! We are happily expecting baby #2 in September. This pregnancy is kicking my butt, let me just say. I've been exhausted and nauseous, which is a new experience for me. I wasn't sick with Madie so I wasn't really expecting it this go round either. And there have been some complications. But I won't go into all of that here. Even though I've been doing a little bit of crafting, like making my own maternity pants following this tutorial, I don't have any pictures of my work. I'll try to remember to get out my camera and get some pictures of the few things I've been doing.
And to those of you who wanted the templates for the lion and elephant headbands...I'm sorry!!! I think about it all the time and one of these days I'll get around to drawing them up and uploading them for you. But I can't guarantee when that will happen.
I hope you all are doing well! And hopefully we'll talk again soon. :)
Monday, November 21, 2011
Animal Ears Templates
I've had several emails from asking for templates for the animal ears headbands I posted about here. This is a work in progress, but here are some of them. Click on the link, then right click with your mouse to print. It should print at full scale (there is a 1 inch square on each of the pages for you to check the sizing, but if it is off a little it won't be the end of the world).
If you have any questions on assembly, don't hesitate to ask!
Wednesday, November 2, 2011
My Memories Suite Giveaway (and promo code)!
I told you guys last week that I had another great way to scrapbook to share with you. I was recently contacted by the people over at My Memories to see if I wanted to do a giveaway of their program My Memories Suite 2.0. Yes, I would! I've never used digital scrapbooking software before, and I was able to create this design in under half an hour. I'm excited to make Christmas cards to send out this year!
The program is pretty easy to use, so don't hesitate to enter even if you've never scrapbooked digitally. Some of my favorite things about this program? There are almost 100 free kits you can download (in addition to what comes already loaded onto the software). And there is a dollar section with over 250 items!!! I love things that cost $1 or under!
Ok, you want a copy of your own?
1 entry - Go to www.MyMemories.com and tell me your favorite paper pack (mandatory for entry).
Want extra entries?
1 entry - Follow the My Memories blog and leave a comment telling me that you do.
1 entry - Follow Ashley's Craft Corner and leave a comment telling me that you do.
That's it! Three chances to enter and please make sure you leave your email address in your comments if it isn't attached in blogger. Good luck! Giveaway ends on Tuesday, November 8th at 11:59 MST. Winner will be announced on Wednesday the 9th.
In case you don't win or don't want to wait to find out if you're the winner, here is a promo code for $10 off the purchase of My Memories Suite software and a $10 coupon for the MyMemories.com store - STMMMS5415
I received a copy of My Memories Suite 2.0 to review. All opinions are my own.
Sunday, October 30, 2011
Halloween 2011
Madie wanted to be Princess Aurora this year for Halloween. So we went to Joann and got some pink sparkly satin for her dress. I was inspired by this post at Crafterhours. Madie then decided that she needed a Prince Phillip to go with her costume so daddy got the part. Once that was decided, Zach kept asking me what I was going to be and we settled on Maleficent (since there was a witch costume in my mom's closet already).
Prince Phillip's hat was made using two sheets of felt and the cape is from a shirt from the dollar store. I would have liked the cape to be a few inches wider, but it was slim pickings when I went. I used this template for the Maleficent headpiece. I cut four pieces out of black knit, sewed two together and stuffed each with batting then glued them to a headband. The staff is a piece of pvc pipe wrapped in black electrical tape. The ball is a plastic ornament that I coated the inside with green food coloring mixed with some Mod Podge. Right before our party last night I broke a glow stick, cut it open and poured it into the ornament. I covered the opening with a little piece of plastic wrap secured with a pony holder and then wrapped the electrical tape around it to attach it to the pvc pipe. I also added a crow from the dollar store to the top of the ornament using E6000 glue. I am so pleased with how it turned out. It looked awesome when it was glowing and since the ornament is just tapped to the pipe I can take it off and add a new glow stick for tomorrow night.
Happy Halloween!
Saturday, October 29, 2011
Animal Ears Headbands
You can now get the templates for these animals here and if you would rather purchase them already made you can do so here (with a few new additions)!
So a couple of weeks ago I showed you the wedding dress-up that I made for my niece for Christmas. Her little sister is not so much into dressing up...at least not with the fancy dresses. She usually plays the part of the kitty cat or the butterfly. So I decided to add to her dress up wardrobe with these animal headbands.
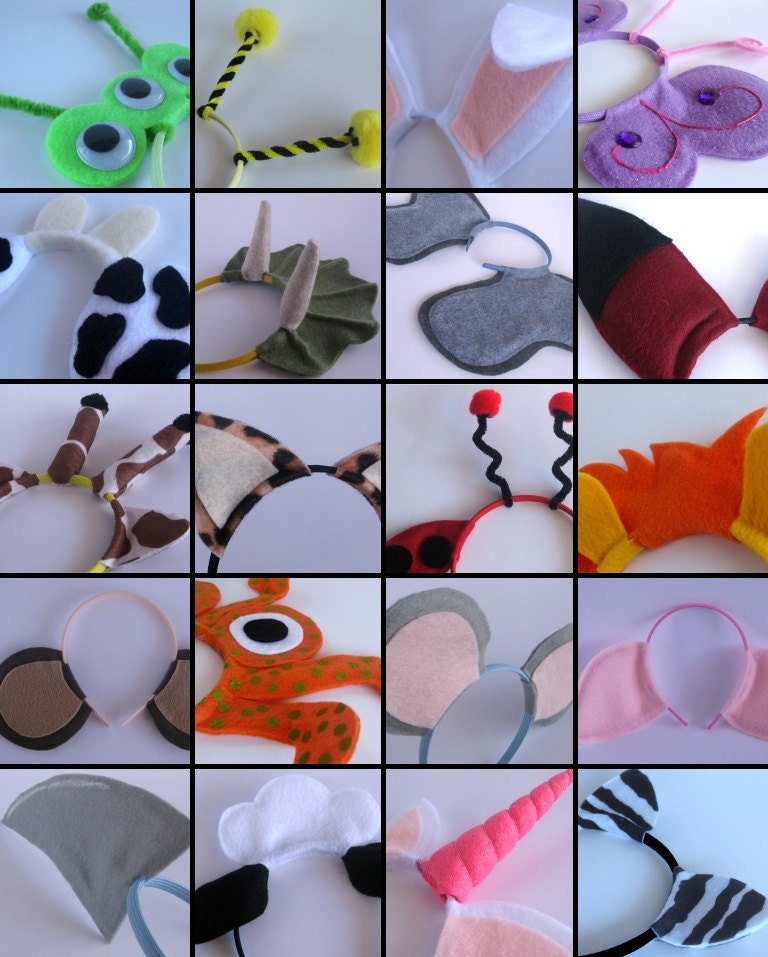
From left to right and top to bottom: bunny, giraffe, bee, fox, monkey, jaguar, pig, mouse, lion, cow, sheep & elephant. Some of the ears might seem really low on the headband (monkey, pig & elephant), but once they are on a head the placement makes more sense and looks really cute.
Here are the backs of some of them.
Cow -
Jaguar -
Fox -
Some of the ears are one piece that wraps around the headband, like the pig.
On some of them the front and the back are two separate pieces that overlap on the underside of the headband, like the monkey. See that line down the middle?
Some are just glued to the tops of the headbands, like the jaguar.
Most of them have pipe cleaners in the middle so that the ears can bend and to help with stability.
And what's a post about animal headbands without a little model action? The pig is one of my favorites (Madie's too). I'll definitely be making a second pig headband so that one can stay at our house.
You can now get the templates for these animals here and if you would rather purchase them already made you can do so here (with a few new additions)!
So a couple of weeks ago I showed you the wedding dress-up that I made for my niece for Christmas. Her little sister is not so much into dressing up...at least not with the fancy dresses. She usually plays the part of the kitty cat or the butterfly. So I decided to add to her dress up wardrobe with these animal headbands.
From left to right and top to bottom: bunny, giraffe, bee, fox, monkey, jaguar, pig, mouse, lion, cow, sheep & elephant. Some of the ears might seem really low on the headband (monkey, pig & elephant), but once they are on a head the placement makes more sense and looks really cute.
Cow -
Jaguar -
Fox -
Some of the ears are one piece that wraps around the headband, like the pig.
On some of them the front and the back are two separate pieces that overlap on the underside of the headband, like the monkey. See that line down the middle?
Some are just glued to the tops of the headbands, like the jaguar.
Most of them have pipe cleaners in the middle so that the ears can bend and to help with stability.
And what's a post about animal headbands without a little model action? The pig is one of my favorites (Madie's too). I'll definitely be making a second pig headband so that one can stay at our house.
You can now get the templates for these animals here and if you would rather purchase them already made you can do so here (with a few new additions)!
Tuesday, October 25, 2011
Scrapbooking the cheating way
So remember when I told you about a calendar I found? Remember? Probably not, here is where I talked about it. Basically it is a calendar that is scrapbook page layouts. It is meant for kids so the quality isn't the greatest. The pages are kind of thin so areas that are white you can see through to the calendar on the back side. But I was able to scrapbook 2 years of our lives in just a few hours. I worked on it after Madie went to bed (not for more than 3 hours at a time) for a couple of nights one week.
Here is one of the finished pages. All I really had to do was add some pictures and some journaling. But I decided to take it one step further. I added a few embellishments to each page.
Here you can see the hat and eyes I added to the snowman.
The buttons and ribbon atop the printed tag.
And a snowflake in the corner of the picture.
It was so easy and so fast. I think I'll keep doing this in the future. Here are a few other pages I really liked.
The Halloween one is my favorite. I love the googly eyes on the pumpkins! Heads up...I'll be sharing another great way of scrapbooking that might also include a giveaway! ;)
Monday, October 24, 2011
Etched glass temple block
Etched glass projects are a little difficult to photograph. Here is the best shot I got of my etched glass temple block. I just got a clear glass block from Home Depot for around $5, cut the Mesa temple out onto vinyl using my Silhouette and then added the etching cream. I left it on for 20 minutes instead of the 5 recommended on the bottle. I read reviews on other blogs and the general consensus was to leave it on for 20-30 minutes. It looks really pretty with a candle lit behind it or just near a window where the light can shine through it. I also made one as a wedding present for my sister-in-law.
Sunday, October 23, 2011
Fall/Halloween Mantel...a little late
So time slipped away from me again. I've been busy working on a felt quiet book, a Princess Aurora costume (along with Prince Phillip for daddy and Maleficent for myself), and more Christmas gifts. Like promised, here is my fall/Halloween mantel.
How about a few close ups?
The pumpkin is a can painted orange with gold shimmer Mod Podge over the top and a green sparkly pipe cleaner for the vine. The two smaller ones on the other side of the mantel also have a cork for the stem but I ran out so the big pumpkin is stem-less. The mummy is a can painted white with strips of cheese cloth wrapped around and secured in a few places with hot glue. I added some large googly eyes and dabbed a few areas with distress ink (not that you can really see that in this picture, but in real life it looks good). Then there is also a coffee filter pumpkin that I made last year.
One more?
I loved this the second I saw it on Pinterest! I couldn't believe people actually took the time to hot glue on each individual eye. There was no way I was going to do that. So I came up with a better way...Mod Podge! I love Mod Podge (seriously, I own 7 or 8 different kinds). I painted my frame black. Let that dry then painted on a small area of Mod Podge and stuck the eyes on. I worked in 2 inch sections so that it wouldn't dry before I got the eyes on. It went so fast this way. Seriously, less than 30 minutes including painting and waiting for paint to dry! I added a cute ribbon and a picture from Halloween of last year. I love it!
If you want any more details of how I made any of my decorations, just ask. I'd be happy to share!
Tuesday, October 11, 2011
Dress Up - Bride
Christmas is approaching. This year I am on the ball...so far...we'll see how long it lasts! Most of my in-laws are taken care of so now I've started working on my side of the family.
I made this cute bride dress up for my niece. The skirt flares out at the bottom more than what shows in this picture. I made the bodice peasant style so that she can easily get it on and off by herself. I also made a veil to go with it, much like the one in this post.I did make the denim Tinkerbell backpack like I talked about in my last post (over a month ago...yikes!). I'll try to remember to get pictures of it this week. Also, on deck for this week *hopefully* - my fall/halloween mantel (including an easy way to make the super popular googly eye frame like seen here), an etched glass project & how I managed to scrapbook 2 years of my family's life in just a few days.
If you want more details on how I made the dress let me know, I'd be happy to share.
Tuesday, August 23, 2011
I Heart Pinterest
Can I just say how much I LOVE Pinterest?! I'm sure by now you all have heard of it. I was a little hesitant to sign up at first, but I am so glad that I did! Instead of searching through my bookmarks folder trying to remember the name of the project I'm looking for, I simply find the picture. Plus, it helps me remember things I bookmarked forever ago that I had forgotten about. I love that I can create separate boards (folders, basically) to pin my items to. I also love that I can pick any of the images on the webpage to show up as my "pin". If you want to see what I've been pinning lately, you can find me here. If you need an invite, just leave me your email address and I'll send you one. Trust me, you won't regret it!
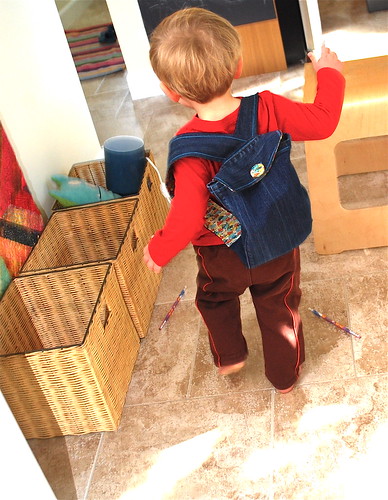
I found this cute toddler backpack on Pinterest today and I'm totally in the process of making it. It is from Chickpea Sewing Studio.
photo via ChickPea Sewing Studio.
Madie has wanted a backpack with Tinkerbell on it since January, I think (yikes)! We are painting Tink on and once that is all dry I'll sew it up for my little munchkin. I'll post pics once it's finished.
Monday, August 8, 2011
Dress Up Veil
This was so easy to make! I took a piece of sparkly white sheer fabric (left over from this dress) and singed the edges so they wouldn't fray...you know, because I was too lazy to hem them all. Then I made a casing on one side and slid it onto a plastic headband. I put a dab of hot glue over the fabric on each side so that it would stay on the headband then I glued a little bow and jewel on top.
Now my little princess can pretend to get married whenever she wants.
Thursday, June 16, 2011
Hand Print Pot Holders
For Mother's Day, Madie and I made these pot holders for my mother-in-law. The idea is definitely NOT a new one, although I haven't seen one before with a ruffle added. This could also be used for Father's Day (maybe without the ruffle, though).
Wednesday, June 15, 2011
Baby socks
Back in April, my older sister had a baby. It is her third girl, so she didn't really need anything but I wanted to get something for the baby anyway. I saw these cute socks at Target and couldn't resist.
They were plenty cute as it was, but I knew they could be cuter. So I got out some ribbon, jewels, thread and hot glue and here is what I came up with.
The ribbons were both stitched and glued. I just used hot glue but if you were concerned about it the jewels coming off in the wash you could use E-6000 or get some sew on jewels. I've used hot glue before and never had a problem with the wash.
And for fun, a little close up. Please excuse Blogger for rotating my picture.
Monday, June 6, 2011
Double Layer Tutu - a semi tutorial
I got an email recently from a friend of my husband's family. She sent me a picture of a tutu that she wants to recreate for her friend's daughters but wasn't sure how to get the double layer look without having to sew and wanted to see if I could figure it out. Here is the picture she sent me:
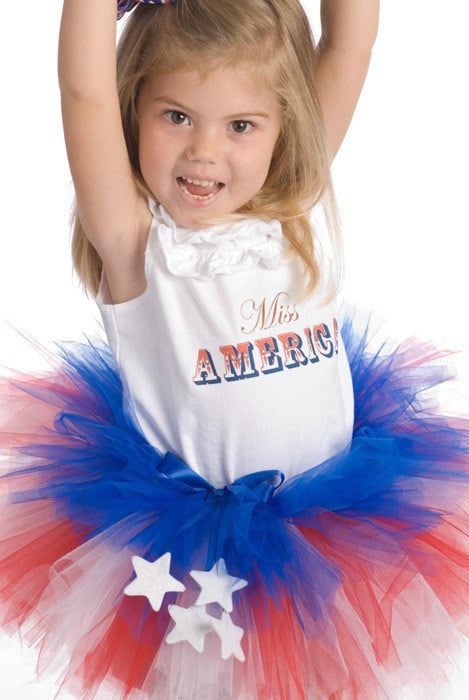
Is this not the cutest tutu?! It makes me wish that my daughter would wear one so that I had a good excuse to make it! Anyway, I did a quick google search and found several places that I could buy the instructions, but I'm cheap and decided that I could figure it out on my own. Sure enough, I did. And can I just say that this is SUPER EASY!!! Don't be fooled by the cuteness of it, it isn't any harder than your standard tie-the-tulle-onto-elastic-tutu.
Ready to learn how to make one yourself?
Start by cutting the tulle for the bottom layer into strips 6 inches wide (the width is entirely up to you, anywhere from 2 to 6 inches wide will work just fine) by twice as long as you want the finished length to be (so for a 10 inch long tutu cut 20 inch long strips). Now for the top layer, cut the strips equally as wide and about half as long. Then you are going to want to stack one top layer strip onto one bottom layer strip so that the middles line up, like so.
I realize that this isn't tulle, but cotton photographs better and quite frankly when I started this I couldn't find my stash of tulle.
Now that you've got your tulle strips stacked together we are ready to tie them onto the elastic (either use plain elastic measured to the size needed and stitched into a circle or depending on what size you need you might be able to get away with a narrow elastic headband like this).
I start by draping them over my finger like so,
then slip the strips under your elastic (which I like to put around my thigh while doing this). I don't have a picture for this next part but you are going to pull the bottom "tails" of tulle through the circle where your finger is.
It should look similar to this (sorry for the blurry pic). Now pull it tight!
Just keep adding your strips of tulle until you just can't fit any more onto the elastic, or until you are satisfied with the fullness of the tutu. If needed you can pull the top layer up to more fully separate it from the bottom (I found my tulle! Light pink is still light pink, what was orange in the pics previously is now hot pink) and trim the ends to make the even if needed.
You should now have two very distinct layers! I didn't finish because I didn't have enough tulle and like I said before, my daughter won't wear it anyway, but this should give you an idea of the finished look.
To get the red and white stripes on the bottom layer, I would do three red then three white and just go back and forth with the blue on top every time.
I hope that made sense and if any of you make a double layered tutu I'd love to see it!
Tuesday, April 26, 2011
Family History Journal - Mother's Day Gift?
So I'm not ignoring you all, I promise! I have quite a few things that I need to blog about (some I even have the post written and pics taken just need to upload them off my camera), but I'm hosting another craft night with the ladies at my church this week, so I probably won't post much again until next week. But I saw this today and just had to share! Isn't this little decorated comp book super cute?!
source: here
I have a soft spot for comp books (you can see some I've done in the past here, here and here) but what's different about this one from Kissing the Joy as it Flies is that it is more of a family history journal. Kira decorated this comp book and wrote several personal questions in it before gifting it to her Grandma a couple of years ago. Well she got it back recently and posted about it; she even includes the list of over 30 questions she put in this journal. Wouldn't this make a great gift for Mother's Day (or if you're crazy like me and already thinking Christmas...)? I know I'll be making these for my grandparents & my hubby's grandparents.
Subscribe to:
Posts (Atom)